8 Easy DIY Halloween Decorations to Transform Your Home on a Budget
Halloween decorating doesn’t require expensive store-bought items or advanced crafting skills. You can create spine-tingling atmosphere using simple materials you probably already have at home. These eight DIY Halloween decorations prove that the most memorable spooky displays come from creativity, not costly purchases. Each project takes less than an hour to complete and uses everyday supplies like mason jars, paper, fabric scraps, and basic craft materials. Whether you’re decorating for a Halloween party, creating trick-or-treat ambiance, or simply want to embrace the season’s magic, these step-by-step tutorials will guide you through each process with clear instructions and helpful tips.
From eerie spider frames that make guests jump to glowing ghost garlands that charm rather than terrify, you’ll discover decorations suitable for every Halloween style. Some projects work beautifully for family-friendly celebrations, while others deliver serious scares for adult gatherings. The best part? Most materials cost under ten dollars per project.
Mason Jar Mummies with Flickering Lights – 4 Steps
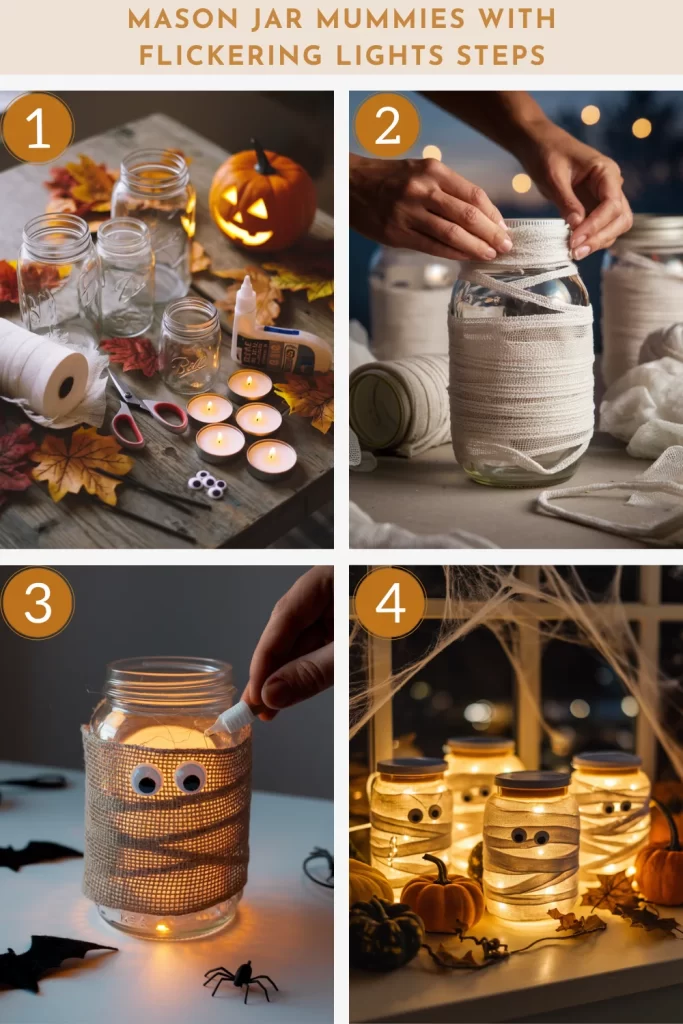
Step 1: Prepare Jars Clean mason jars thoroughly and remove labels. Insert battery-operated tea lights or LED candles inside each jar before beginning wrapping process. Test lights to ensure they’re working properly.
Step 2: Wrap with Gauze Start wrapping medical gauze bandages around jar bottom, working upward in overlapping layers. Leave strategic gaps between wraps for light to escape effectively. Secure bandage ends with small craft glue dots.
Step 3: Add Eyes Glue googly eyes at different heights on each mummy jar for individual personality. Use two eyes per jar but vary their positioning for unique expressions. Larger eyes create friendlier appearances.
Step 4: Display and Light Arrange completed mummy jars as table centerpieces, pathway markers, or hanging decorations. Turn on internal lights for warm, diffused glow. The gauze texture softens harsh LED light, creating cozy Halloween ambiance throughout your space.
DIY Halloween Spider Frame – 4 Steps
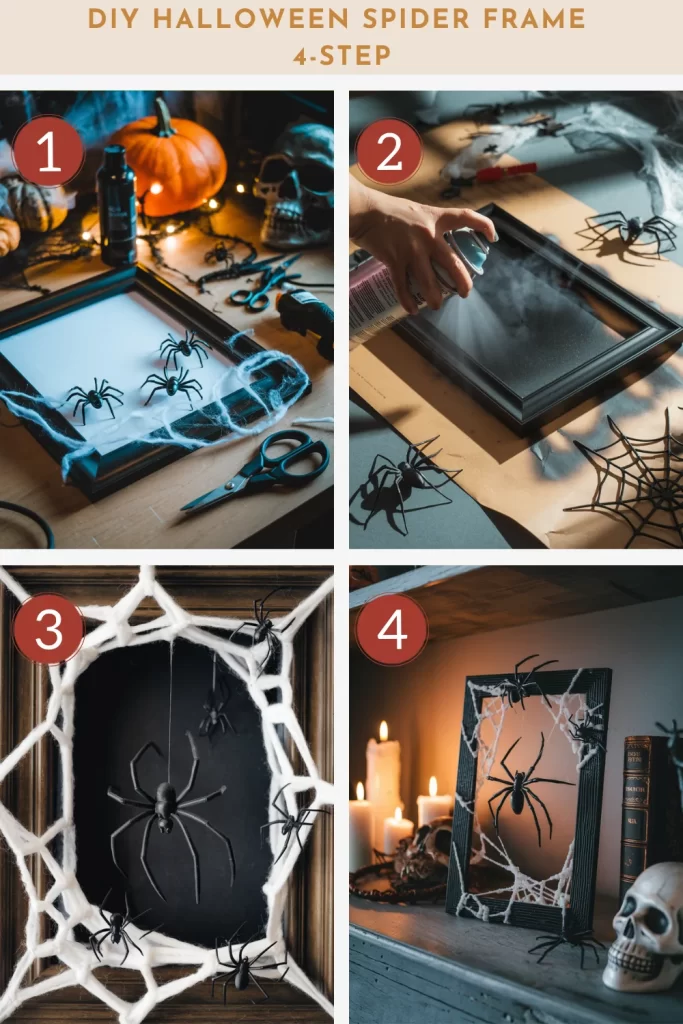
Step 1: Prepare Your Frame Remove the glass and backing from an old picture frame. Clean the frame thoroughly and spray paint it matte black. Let it dry completely in a well-ventilated area. This creates the perfect gothic base for your spooky creation.
Step 2: Create the Web Base Stretch white cotton batting or cheesecloth across the frame opening. Secure it to the back with a staple gun or strong tape. Pull and stretch the material to create natural web-like holes and varying thickness throughout.
Step 3: Add Spider Details Hot glue plastic spiders at different points across the webbing. Attach some directly to the frame edges and let others dangle on clear fishing line for realistic movement. Vary the spider sizes for authentic appeal.
Step 4: Final Assembly Mount the completed frame on your wall using appropriate hanging hardware. Position it in dimly lit areas like hallways or above doorframes where the shadowy effect will be most dramatic and startling to guests.
DIY Pumpkin Candles in Egg Tray – 4 Steps
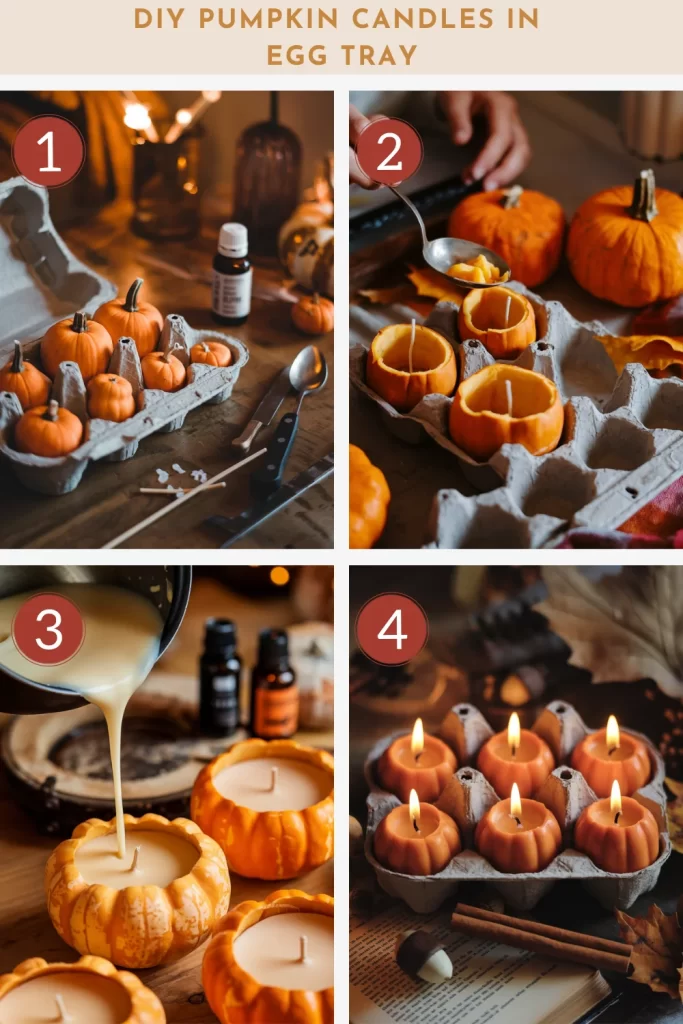
Step 1: Gather Materials Collect small pumpkins, egg cartons, candle wicks, and orange candle wax. Clean your workspace and set up a double boiler for melting wax safely. Arrange egg cartons to hold your pumpkins steady during the process.
Step 2: Hollow the Pumpkins Cut tops off small pumpkins and scoop out all seeds and pulp using a spoon. Scrape the walls thin but leave enough structure for stability. Place each hollowed pumpkin in an egg carton compartment to keep it upright.
Step 3: Add Wicks and Wax Insert pre-tabbed wicks into the center of each pumpkin. Melt orange candle wax in your double boiler, then carefully pour into the hollowed pumpkins. Fill nearly to the top, leaving small space for expansion.
Step 4: Cool and Display Allow wax to cool completely while pumpkins remain in egg cartons. Once set, remove from cartons and arrange on your Halloween table. Light carefully and enjoy the warm, natural pumpkin scented glow.
Bloody Mirror with Silhouette – 4 Steps
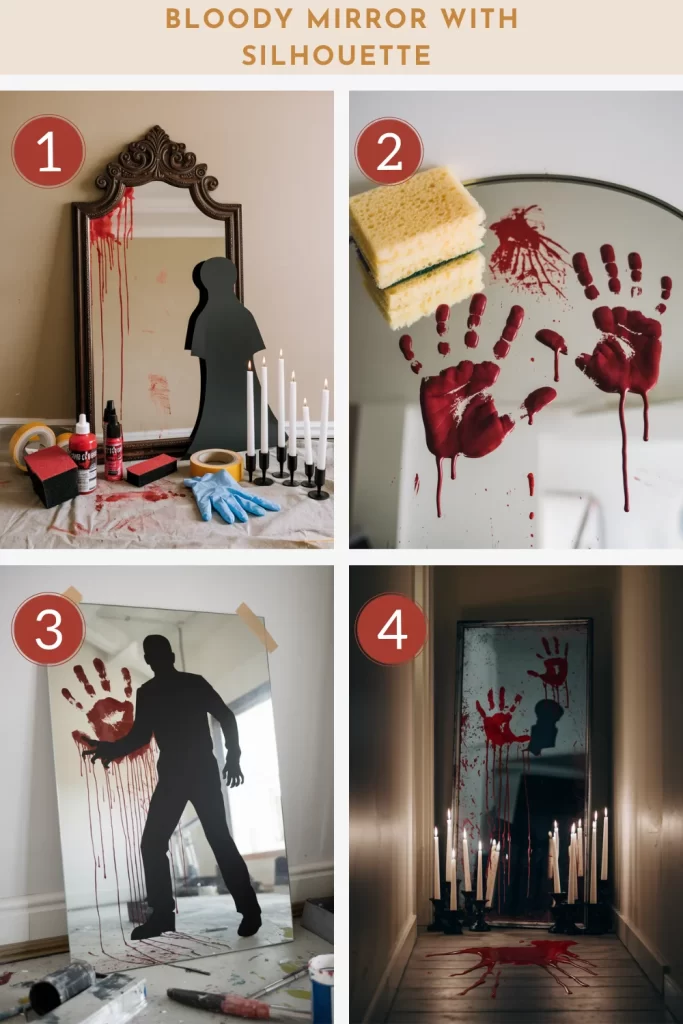
Step 1: Prepare Blood Mixture Mix red acrylic paint with corn syrup in a 2:1 ratio for realistic blood consistency. The corn syrup helps create natural dripping effects. Prepare your workspace with plastic sheeting to protect surfaces from splatter.
Step 2: Create Handprints Dip your hands in the blood mixture and press firmly onto the mirror surface. Make multiple handprints at various angles and positions. Let some prints overlap for chaotic, frantic appearance. Work quickly before mixture dries.
Step 3: Add Silhouette Cut a human silhouette from black cardboard and position it behind the mirror to cast an ominous shadow. Secure with tape on the back. The reflection combined with bloody prints creates unsettling visual impact.
Step 4: Enhance with Lighting Arrange flickering candles or dim lighting around the mirror base for theatrical effect. The dancing shadows will make the silhouette appear to move. Clean mirror after Halloween using warm soapy water and gentle scrubbing.
Jar Filled with Halloween Buddies – 4 Steps
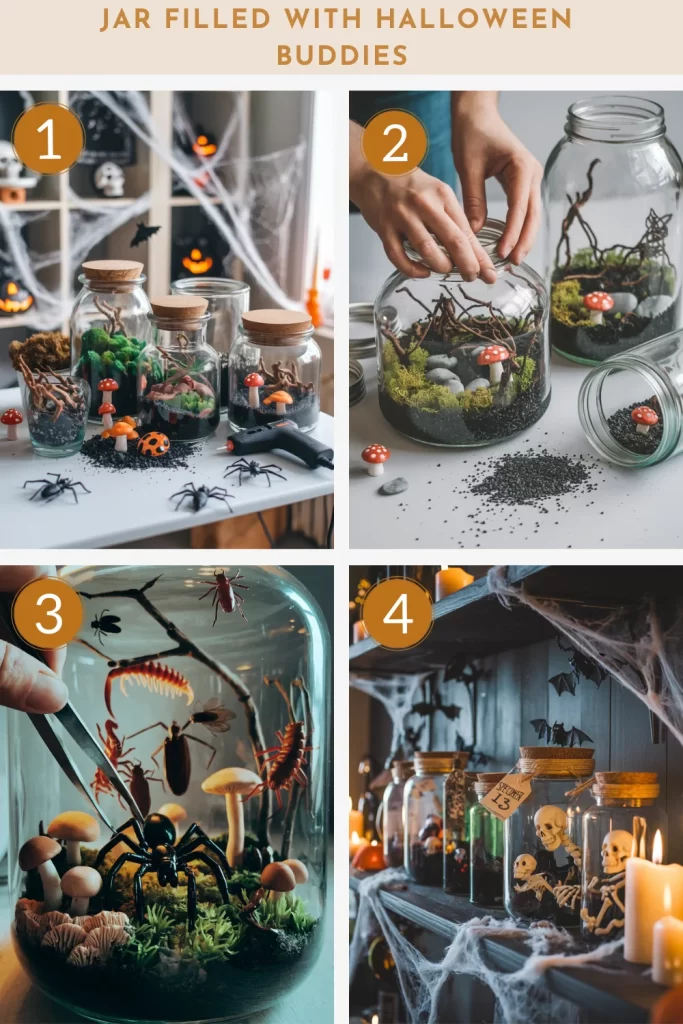
Step 1: Layer the Base Fill the bottom of glass jars with black aquarium sand or potting soil. Add preserved moss, small rocks, and miniature mushrooms to create varied terrain. Build up layers for visual depth and natural appearance.
Step 2: Position Figurines Place Halloween miniatures like tiny skulls, ravens, or skeletal hands throughout the landscape. Arrange them at different levels and angles for dynamic scenes. Leave space between elements for light to filter through effectively.
Step 3: Add Lighting Tuck battery-operated LED fairy lights between moss and figurines. Position lights to illuminate key elements while maintaining mysterious shadows. Test the lights before sealing to ensure proper placement and battery access.
Step 4: Create Display Arrange multiple completed terrariums at varying heights on shelves or tables. Group odd numbers for best visual appeal. Add spider webs between containers and dim surrounding lights to enhance the spooky atmosphere of your Halloween village.
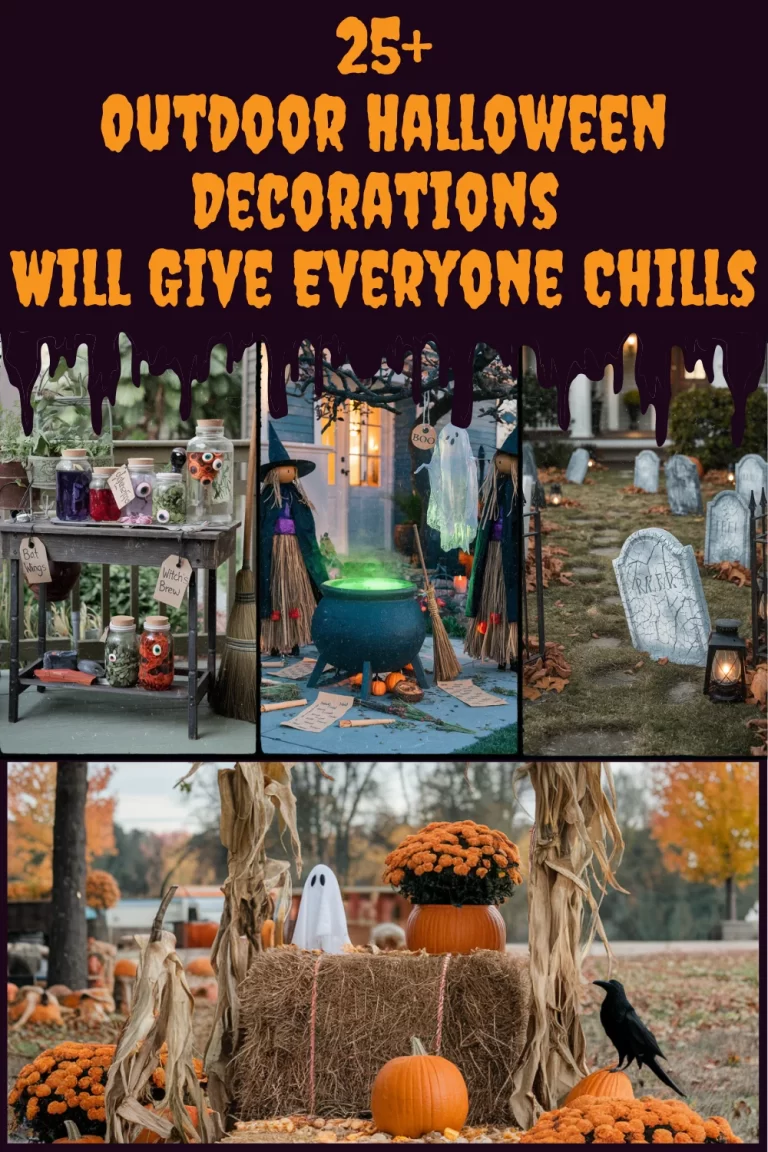
Spooky Halloween Potion Bottles Display – 4 Steps

Step 1: Prepare Bottles and Labels Collect various glass bottles and jars of different sizes. Create aged labels by soaking paper in strong tea, then drying completely. Write spooky potion names like “Witch’s Brew” or “Dragon Tears” with calligraphy pens.
Step 2: Mix Colored Potions Fill bottles with colored water using food coloring. Add glitter, dried herbs, small plastic insects, or other mysterious objects for texture. Each bottle should have different contents to create variety in your collection.
Step 3: Seal and Label Cork bottles tightly and wrap twine around necks for rustic appearance. Attach aged labels with small string ties. The weathered look adds authenticity to your witch’s apothecary display.
Step 4: Arrange Display Place bottles on wooden shelves or tables with dim lighting. Add artificial spider webs draped around bottles and include candles for flickering shadows. The amber glass catches light beautifully, creating mysterious atmospheric glow throughout your space.
Paper Bats Flying Across the Wall – 4 Steps
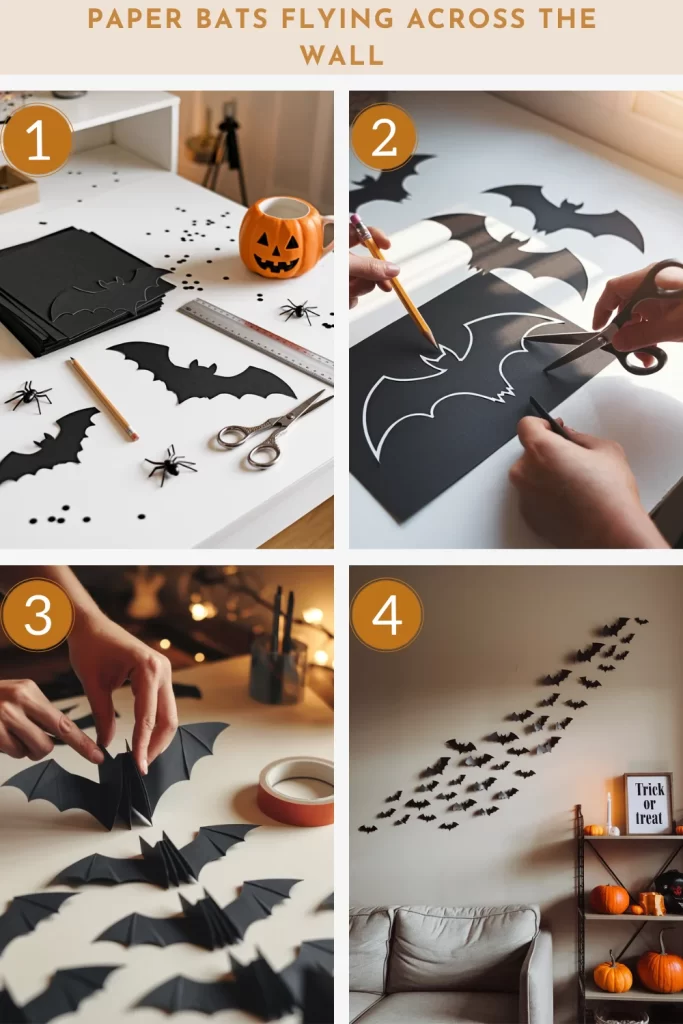
Step 1: Create Bat Templates Draw bat silhouettes in various sizes on cardboard to use as templates. Make larger bats for foreground and progressively smaller ones for distance effect. Cut multiple bats from black construction paper using your templates.
Step 2: Add Dimension Fold each bat’s wings slightly upward along the body line before attaching to wall. This creates three-dimensional shadows and makes flat cutouts appear more lifelike and dynamic against your wall surface.
Step 3: Plan Flight Pattern Arrange bats flowing diagonally across wall from one corner toward opposite direction. Start with larger bats and gradually decrease size to create perspective depth. Plan the entire layout before applying any adhesive.
Step 4: Attach to Wall Use removable double-sided tape to attach each bat to wall. Press firmly but avoid permanent adhesives that might damage paint. The flowing pattern creates dramatic movement that transforms any blank wall into Halloween focal point.
Ghost Garland with Cotton and String Lights – 4 Steps
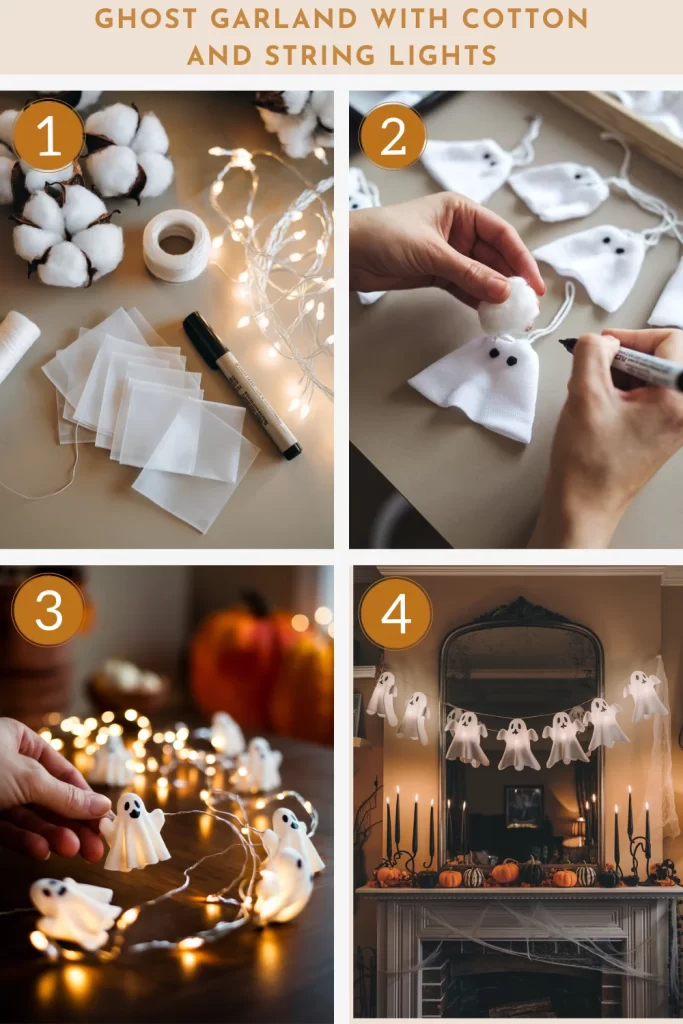
Step 1: Cut Ghost Shapes Cut ghost silhouettes from white cotton fabric or cheesecloth, making each about 4 inches tall. Leave extra length at bottom for flowing, tattered effects. Cut multiple ghosts depending on desired garland length.
Step 2: Insert Lights Thread battery-operated fairy lights through each ghost, positioning one LED bulb inside the head area. Secure lights with small fabric glue dots or tiny stitches to prevent shifting during handling.
Step 3: Add Facial Features Draw simple eyes and mouths on each ghost using black permanent marker. Keep expressions friendly rather than scary for family-appropriate decoration. Vary facial expressions to give each ghost unique personality.
Step 4: String Together Connect ghosts along the light string, spacing them evenly for balanced appearance. Drape finished garland across mantels, doorways, or wrap around banisters. The internal glow creates magical ambiance rather than frightening atmosphere.
DIY outdoor decorations are just the start. Give your guests a fright indoors too with these Halloween Living Room Designs